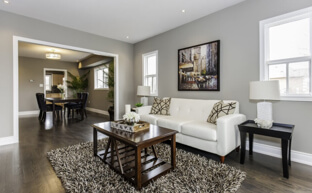
Too many people the floors are the most important decorative part of the house. They also get the most use and have to be cleaned almost on a daily basis. This is why buyers are very particular about what kind of flooring will go down in their homes.
Hardwood and Ceramic Tile Followed Carpet
Until recently hardwood and ceramic tile were the undisputed kings of Canadian flooring. Wall-to-wall carpet, the envy of the 1970's and 1980's, drifted out of favour in the early 1990's due to the rise of pre-finished hardwood planks and a turn in favour of ceramic tile. Carpet harboured dirt, germs and mites, and people searching for a cleaner home ripped them out in favour of a flooring product they could easily clean.
Wood floors made from oak and maple used to be high maintenance products because they had to be waxed periodically. When the finish wore down the old wax had to be stripped off and a new coat applied. The new hardwood planks have an extremely hard finish and need only be damp mopped to clean. However, hardwood plank flooring is expensive to buy and equally expensive to install - from $10 to $15 a square foot for installed oak. Tile is cheaper and is a good product for radiant, in-floor heating. However, for many people it is hard on the feet and back and very cold in the winter.
Laminate Floor: The European Wonder
In the late 1980's a Swedish company called Pergo began exporting its flooring product to North America and in less than fifteen years it became the gold standard for flooring in the US. The product was cheap to buy and did not need a journeyman to install it. Since the Pergo days hundreds of companies have come on-stream pushing the price down to under $1.00 a square foot for a decent laminate plank.
The great thing about laminate floor is that it mimics hardwood and can embellish a room as a hardwood floor can. Not only that it can be bought in packages and is easily transported in a minivan.
The Layers of Laminate Flooring
Unlike wood planks laminate floors are multi-layered and each part has its important function:
- Wear Layer: This is a very hard, transparent surface that resists scratches and marks. It also resists water and can be easily washed.
- Design Layer: Laminate flooring now imitates almost every species of wood and all types of ceramic tile patterns. However the design is actually a photograph that is fused to the wear layer.
- Core Layer: The top two layers are the defining parts of the laminate floor but the surface would not be able to withstand pressure without the core layer. This is a strip of densely compact particle board fused with a hard glue
- Stabilizing Layer: The bottom of each plank is coated with a resin-soaked, waterproof strip that holds the plank layers together.
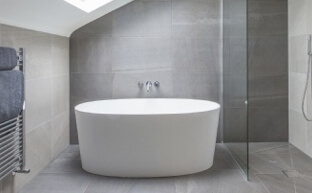
- Connections: The early Pergo had to be glued and this is still recommended for putting the floor down in bathrooms and kitchens so that water can't seep into the edges. However, most laminate floor planks are snapped together using the milled edges. It is almost like a tongue-and-groove plank but will not pull apart. However, most planks can be taken apart two or three times before the edges wear out.
Buying Your Own Laminate Floor
Before you buy laminate floors look at home store flyers and other sales. Some companies discount the flooring up to 50%. To get the best buy always check the AC Rating which evaluates the laminate flooring form 1 through 5, with 1 being the lowest. Unless you are doing a closet or a place with light traffic always go for a 3.5 or better. And although many stores will try to sell you on thickness look for the AC Rating because an 8 mm floor with a rating of 5 will be a more durable flooring that a 10mm floor with a rating of 2.
What to Buy For Installing Laminate Floor
- Laminate Planks: Always buy up to 20% more than you need because the stores will take back unopened boxes. You need more because of:
- Bad cutting
- Accidental damage after the fact
- You may come up short and the store does not restock that design.
- Underlayment: This is a thin pliable foam product that adds a cushioning for sound-dampening and to cover imperfections in the subfloor that could cause squeaks in the future.
- Tools
- Chop Saw: This is preferable for right-angle cuts but a good miter box will suffice.
- Table Saw: “Ripping,†or cutting a piece lengthwise, is always a joy with a table saw but a good eye and a sharp cross-cut saw will do as well.
- Jigsaw: There may be pipes and other obstacles to cut around so a jigsaw or a manual coping saw is needed.
- Mallet: A hammer is too hard for tapping in planks so a rubber mallet is the best tool here.
- Laminate Installation Kit
- Pull bar: This is like a pry bar with a small, right-angled tab to pull the pieces together tightly on the ends.
- Space Tabs: These are small plastic pieces that are used against the wall when starting out. Laminate floors expand and contract so you have to leave spaces for the expansion.
- Bumpers: These are plastic pieces that are grooved to fit the leading edge of the laminate plank so that the side of the plank can be hit with a mallet without breaking or deforming the click tab.
- Tape Measure
- Retractable Knife
Preparation
- The Floor: Carpet is to be removed and all staples, nails and carpet tacks taken out. This also includes left-over traces from glued-down, foam-backed carpet. The floor should be smooth.
- Baseboards: Most laminate floors are “floating,†meaning they are not nailed or glued down. Baseboards can hold the whole floor in place. If the baseboards are good you don't need to go through the hassle of removing them. You can buy strips of quarter-round trim that can be nailed to the baseboards and painted the same colour.
- Doors: If the laminate is going over linoleum or some other surface it may raise the level of the surface. In this case the bottoms of doors and door jams may have to be cut 1/4†to 3/8â€. A manual coping saw works best for these as they can get into tight spaces.
The Installation
- Underlayment: Roll out the foam and seal the joints with clear tape. Avoid overplapping.
- Start Point: Begin in the in a corner of the room with no obstructions so you can get close to a right angle. Place the spacers along the starting walls.
- Stagger: Planks should not be started the same on every row. The first plank is whole, as is the third, fifth, seventh and so on. The second row starter plank is halved with the chop or miter and also cut the even numbered ones as you go along. Only use the piece iwht the tabe on the end and save the cut pieces for the other end.
- Build the Rows: Follow the spacers along the wall as you get the floor started. When the fused planks of the first two rows are halfway down the wall you can start the third row. The pull bar is used to squeeze the ends of the planks together and the bumpers on the edges are tapped with a mallet to get these tight.
- Weird Cuts: Pipes, heaters and conduit are obstacles and the laminate planks will have to be cut with a jigsaw or coping saw to fit around them.
- Baseboards: When the floor has been completed it is time to lock it in place with baseboards or the quarter-round strips. A pneumatic nailer works best for this but small finishing nails do the trick too.
For a qualified professional to install your laminate floor consult our Contractor Directory or simply post your project online and a contractor will contact you.
Posted by: TrustedProsSuggested Reading For You

DIY Home Improvement; Selecting the Right Underlayment for your New Floor
If you are one of the many DIY home improvement handymen preparing to install new floor covering, there is...
Sustainable Flooring Options for your Home
If you're interested in pursuing environmentally friendly design, one of the best choices you can make for...